| LIBROW |
| Professional | Help | Support | Contacts |
Help 1.1
Getting started
1. Librow calculator
Librow calculator project is called to put the computational power of the PC at your disposal. Now you can:
- See, edit and recalculate entire calculation — not just last number or function.
- Enter mathematic expressions in book notation — no extra knowledge is needed.
- Use as much memory as you need — just study two commands.
- Save your calculations to disk — you can edit them in any unicode text editor.
- Print your calculations in format you like — you can manage layout, margins, font and extra info to be placed in pages.
- Customize the interface to your likeness — change colors, fonts and layout.
- Access any help you need including handbook on functions — just in two clicks.
More on all that read below.
2. Getting familiar with interface
On startup calculator looks like below — fig. 1.
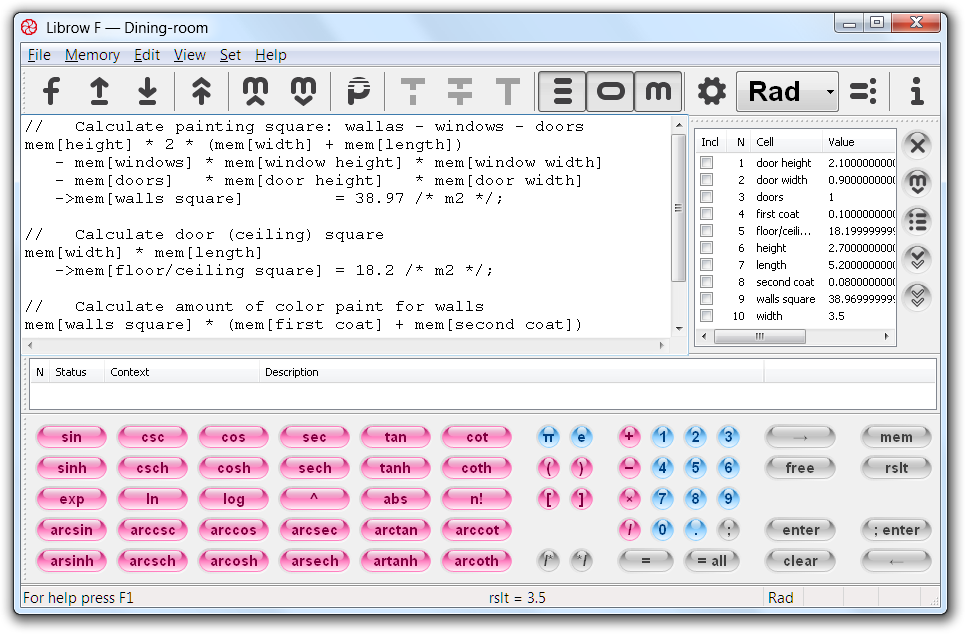 Fig. 1. Calculator interface.
Here is the list of interface parts you see and their description — compare the list items with the picture above:
| Item | Location | Description | |
|---|---|---|---|
| 1 | Title bar | Along the top of the window | Displays the name of the loaded file |
| 2 | Menu | Below Title bar | Provides access to calculator management commands |
| 3 | Toolbar | Docked below menu | Provides fast access to calculator main functions |
| 4 | Editor | The main window | Enter here expressions to calculate |
| 5 | Memory | Docked to the right | Displays memory content, manages memory and has statistics button |
| 6 | Log | Docked above Keypad | Displays warnings and errors encountered during evaluation |
| 7 | Keypad | Docked at the bottom | Holds all the mathematical functionality |
| 8 | Status bar | Along the bottom | Displays prompts, current evaluation result rslt and status information |
You can click the links in the table to get more detailed description of the corresponding items, but there is another way to get explanation for any interface part just in two clicks.
3. Help and hand-book in two clicks
Now you understand in general what every part of the calculator means, but what about details? Some parts for you are obvious like sin button in the Keypad — every calculator has it, — some you can guess, and some are mistery for a while. Not to list all known and unknown items here we provided a two-click way to get help or reference for any part you can see in calculator window, so, you can go directly to the information of interest.
There is Context Help
button in the Toolbar — fig. 2.
 Fig. 2. Context Help command in Toolbar.
Click the button — cursor will get a question mark attached to it — and now click item of interest, for instance, ^ button in Keypad — and Help will get you to Power function page of the hand-book. Yes! Your Help has a hand-book on functions supported by calculator as its part — so, at your hand definition, graph and identities for any function.
In some cases Context Help is not available, like in dialogs. In this case just hit F1 button.
4. Customizing interface
There are three points you can customize:
- Layout — windows size and position.
- Colors and fonts.
- Behavior.
Change the size of the calculator window according to your purposes. Now, Toolbar, Memory, Log and Keypad are dockable windows. It means you can detach them and have floating or attach to any side of the calculator. Parts you do not need you can hide. Here are three important shortcuts for hiding/displaying main windows:
| Window | Shortcut | |
|---|---|---|
| 1 | Keypad | Ctrl+K |
| 2 | Log | Ctrl+L |
| 3 | Memory | Ctrl+M |
Log and Memory windows are resizable — adjust their size to your likeness by dragging the border.
You can hide Toolbar and
Status bar with the help of
View menu — fig. 3.
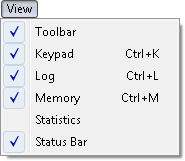 Fig. 3. View menu.
Now, when you have the layout you like, it is time to set fonts and colors of your favor. Adjust the font of the edit window in Set menu:
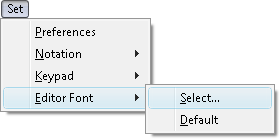 Fig. 4. Select Editor Font command in Set menu.
Keypad as the most important part of calculator is highly customizable: you can change its style, button text and color. Thus, here is the Keypad with changed colors:
 Fig. 5. Keypad with changed colors.
And here is Keypad with changed style:
 Fig. 6. Keypad in Vista style.
Explore Keypad item of the Set menu for this functionality. Use Context Help and F1 on menu items to see options before you make changes.
The last thing you can change for Keypad is notation. If you prefer to have sh instead of sinh engage Set >> Notation >> East command — fig. 7.
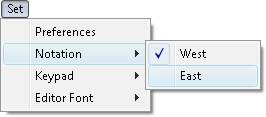 Fig. 7. Set East Notation command in Set menu.
Default calculator behavior is optimal, but you can change it if, for instance, you like different function notation. All important options you can find in Preferences — fig. 8.
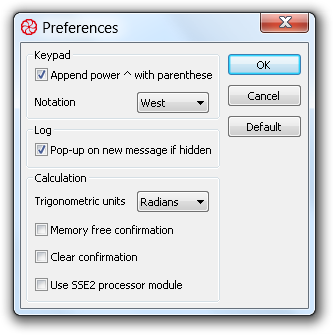 Fig. 8. Calculator Preferences.
You can get there engaging Set Preferences command in Toolabar:
 Fig. 9. Set Preferences command in Toolbar.
Now, when interface is tuned, you can start calculations.
5. Calculating
There are two ways you can enter expressions in calculator: you can use Keypad or directly type in from keyboard. The beauty is you can enter everything in familiar book notation, then edit and recalculate your input. For instance, enter
sin(7.8)To calculate the current expression click = button or fire Ctrl+= shortcut — calculator evaluates it:
sin(7.8)=0.13571557243430438Enter semicolon ; as separator and enter new expression:
There is an important symbol here: rslt, which represents the current result. Look at Status bar and in result pane you can see rslt = 0.13571557243430438 — the result of the last evaluation.
Now fire Ctrl+= shortcut and evaluate the last expression:
Now change the first expression:
And click = all button or fire Ctrl+Shift+= shortcut. Both expressions get recalculated:
Now click clear button in Keypad to clear the editor and enter
ln(0)Click = — the expression is not evaluated, but instead you have error message in Log window: Function has singularity at 0. There are other types of error and warnings you can get from calculator — details you can find in Log article.
Now it is time to explore powerful extension of the calculator — its memory.
6. Using memory
To address memory use mem operator and to push value to memory use → operator — that's simple. Clear the editor and enter:
4−>mem[frequency]Fire Ctrl+= to execute the command:
4−>mem[frequency]=4Look at Memory window and you will find that cell frequency was allocated and value 4 was assigned to it. We have frequency, now add time:
4−>mem[frequency]=4;
3.5−>mem[time];
And finaly:
Fire Ctrl+Shift+= to calculate all expressions:
That is how you are addressing values put to memory.
You can clear the memory by clicking free button. Another thing you can do with memory is saving — read further.
7. Saving and loading your files
You can save your calculations in file as in any other application, just be aware that despite its .lcl or .lcm extension it is unicode text file and you can edit it in any unicode text editor like MS Notepad.
Another important thing is file management logic — calculator supports two file types: .lcl which supposed to be calculation files and .lcm which supposed to be memory files. 'Supposed' because the difference between files is imaginary one. This difference allows you to separate processing and datasets. For instance, you can have several files that contain versions of the same data, like different sizes, and then you can have just one calculation file that intakes data and calculates square and volume. Or you can have several processing files, that process the same data different ways: first file calculates square and second one — volume.
So, you can save current editor content both as .lcl and .lcm file and you can load both types into editor back. You can Execute the .lcl file and you can Load the .lcm file. Both commands process file without loading into editor, and indeed both of them can process another type too. And as .lcl file .lcm file can contain any calculator command as well.
You can dump the current memory content as .lcm file.
Let us demonstrate this logic. Clear the editor window and enter:
4−>mem[a];
3−>mem[b];
Fire Ctrl+Shift+= to put values to memory and click Save memory button in Toolbar to save memory content as Rectangle 1.lcm.
 Fig. 10. Memory Save command in Toolbar.
Now change the code to
5−>mem[a];
6−>mem[b];
and click File >> Save As to save the file as Rectangle 2.lcm — select the proper file type for that in File Save As dialog.
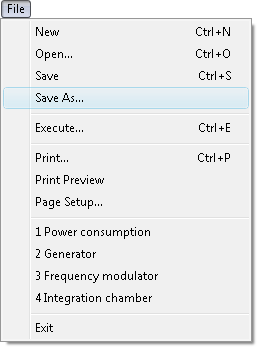 Fig. 11. File Save As command in File menu.
Take into account, that first time you saved memory content, but this time you are saving the text you have entered in the editor — that is why it is not necessary to perform evaluation to put values into memory as before. Now clear the editor window and enter
which is the square of a×b rectangle. Now free the memory and click in Toolbar Load memory button to pick up the Rectangle 1.lcm file. Fig. 12. Memory Load command in Toolbar.
In Memory window you can see loaded values a and b. Fire Ctrl+= to perform calculation:
Now click Load memory again to load the Rectangle 2.lcm file. You can see in Memory window that a and b have changed their values. Fire Ctrl+= again to calculate new square:
Now let us inverse the order. Change the code
and save it as Square.lcl file. Click Open button in Toolbar and open Rectangle 1.lcm.
 Fig. 13. File Open command in Toolbar.
Evaluate the file to execute its memory commands and now click Execute button and pick up Square.lcl for execution.
 Fig. 14. File Execute command in Toolbar.
Look at Memory — the execution resulted in memory value square, which keeps the square of a×b rectangle.
And now it is time for paper work.
8. Printing your calculations
The most important thing in printing — you can manage the format to get the hard copies you like. Go to File >> Page Setup... to see the available options — fig. 16.
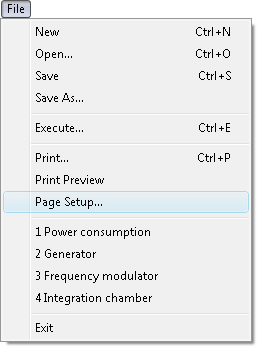 Fig. 15. Page Setup command in File menu.
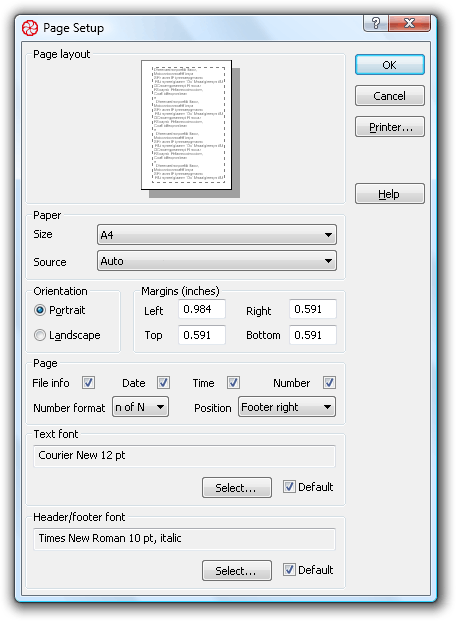 Fig. 16. Page Setup dialog.
First, you can manage the print font for your calculations — click Select... button in Text font group.
Second, you can add header and footer with some useful information to the pages — see Page group: File info includes file name into the header, Data and Time add data and time to the footer and Number adds page number. You can choose the page number Position and pick up the proper page Number format in corresponding combos.
Third, you can change the font used for header and footer — click Select... button in Header/footer font group.
To test printing set options like in the figure above, select the proper paper size and click OK button. Now click File >> Print preview — you will get into preview mode — fig. 18.
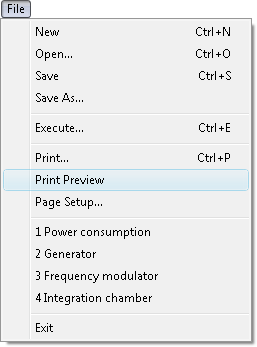 Fig. 17. Print Preview command in File menu.
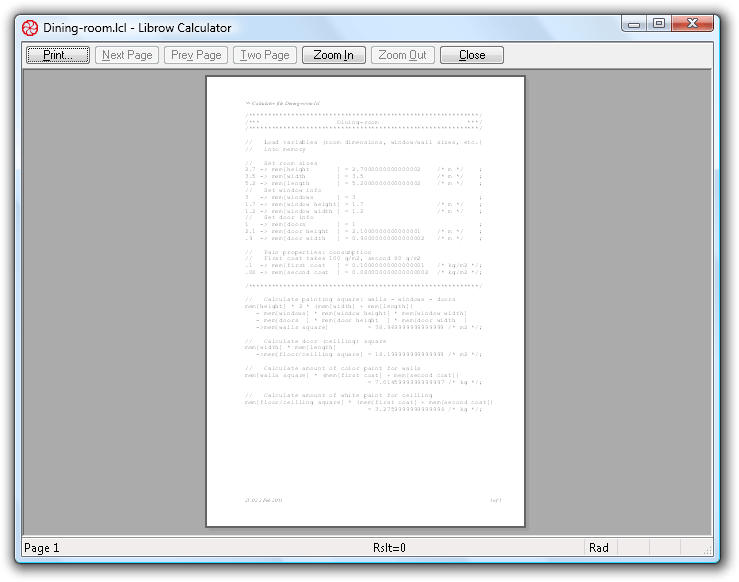 Fig. 18. Print preview mode.
Click Zoom In button twice to see the page close and click Print... button to bring in the Print dialog, click there OK to print the page.
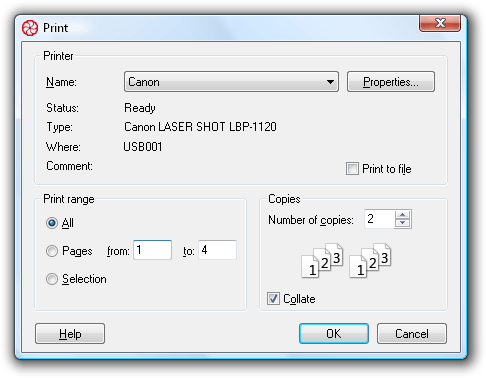 Fig. 19. Print dialog.
Once you found your favorite print format there is no need to change page setup any more — your settings are automatically memorized, — so, you can just go directly to printing clicking Print button in Toolbar — fig. 20, — or firing Ctrl+P shortcut.
 Fig. 20. File Print command in Toolbar.
| Chapter 1 Getting started |
|
| Chapter 2 How to calculate |
|
| Chapter 3 How to use memory |
|
| Chapter 4 How to calculate data statistics |
|
| Chapter 5 How to print out calculations |
|
| Chapter 6 How to customize the interface |
|
| Chapter 7 Keyboard shortcuts |
|
|||||||||||||
|
|||||||||||||